Ross-Tech is not responsible for any
damage or problems that may result from following these instructions. They
are to be used at your own risk. As always, you should refer to a
Factory Repair Manual for your vehicle!
This procedure details how to
lower/raise the zero position for the Level Control module
in VW Phaeton (3D), VW Touareg (7L), Audi A6 (4F), Audi A8 (4E) and Audi Q7 (4L) vehicles.
This procedure does not
apply to the old Audi A6 (C5 platform, 4B chassis) Allroad. For that vehicle, there is a
different procedure.
There are certain test conditions
that must be met before doing this procedure:
-
Transmission in park/neutral.
-
Start the vehicle, keep the engine running and do not
switch off the ignition.
-
Doors have to stay closed,
otherwise the system is not ready.
The default values:
Audi A6 (4F) (PR-1BK):
386 mm (front) and 384 mm (rear)
Audi A6 (4F)
Allroad (PR-1BY):
388 mm (front) and 380 mm (rear)
Audi A8 (4E) standard suspension (PR-1BK): 416 mm (front) and 398 mm (rear)
Audi A8/S8 (4E)
sport suspension
(PR-2MA/2MB): 396 mm (front) and 378 mm (rear)
Audi Q7 (4L): 449 mm (front) and
465 mm (rear)
VW Phaeton (3D) RoW (Rest of World): 407 mm (front) and 401 mm (rear)
VW Phaeton (3D) NAR (North American Region): 417 mm (front) and 411
(rear)
VW Touareg (7L)
standard: 497 mm (front) and 502 mm (rear)
VW Touareg (7L) offroad: 488 mm (front) and 498 mm (rear)
North American Phaeton owners: Please read a
very detailed alternate procedure here
The above values are NOT
what you enter into each Adaptation channel. You need to enter the ACTUAL
MEASURED VALUES from each corner of the car as explained below.
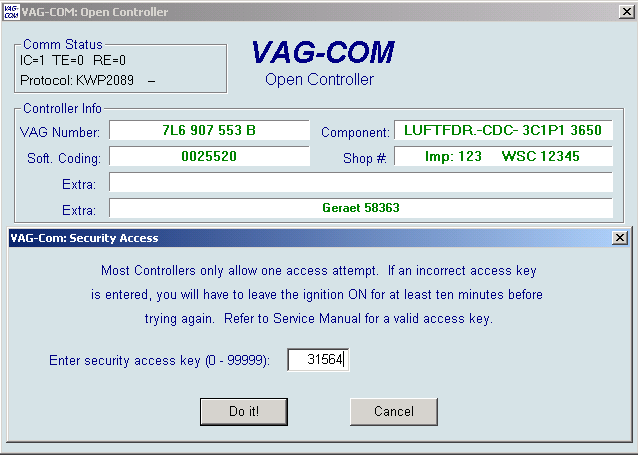
[Select]
[34 - Level Control]

[Security Access - 16]
Enter 31564
[Do It!]
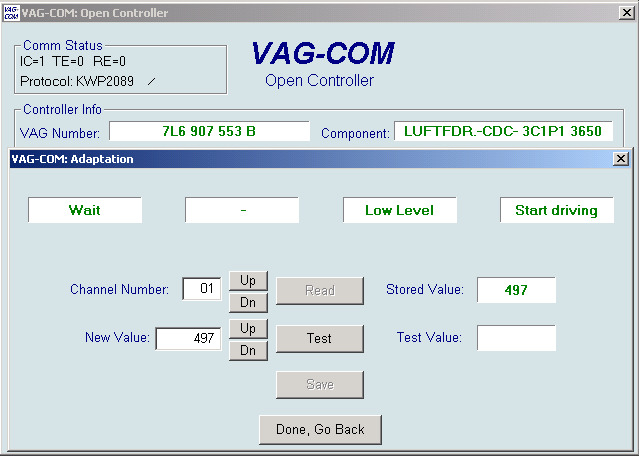
[Adaption - 10]
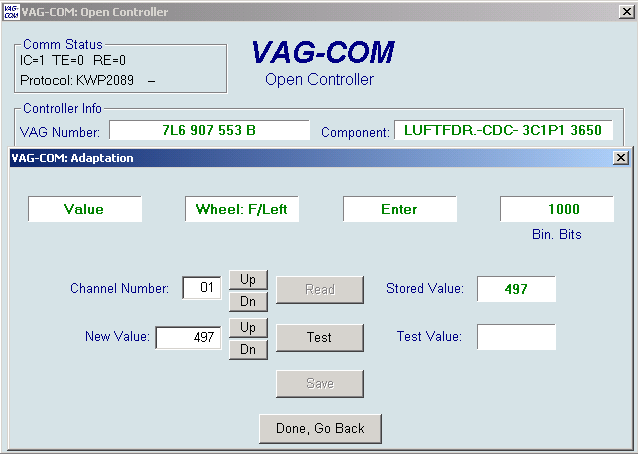
Channel 01 (front left)
[Read]
Wait until the car goes into 2 different levels.

Measure the heights from wheel center to the lower edge of the fender (see
comments).
Enter the ACTUAL MEASURED VALUE FROM THE CAR in "new value" in Millimeters into Channel 01.
[Test]
[Save]
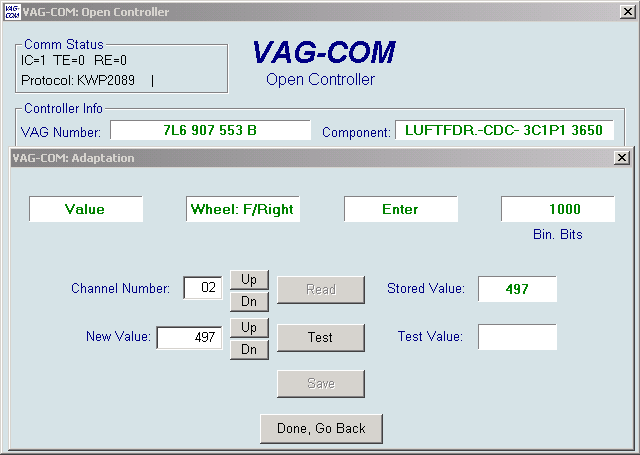
Channel 02 (front right)
[Read]
Measure the heights from wheel center to the lower edge of the fender (see
comments).
Enter the ACTUAL MEASURED VALUE FROM
THE CAR in "new value" in Millimeters into Channel 02.
[Test]
[Save]
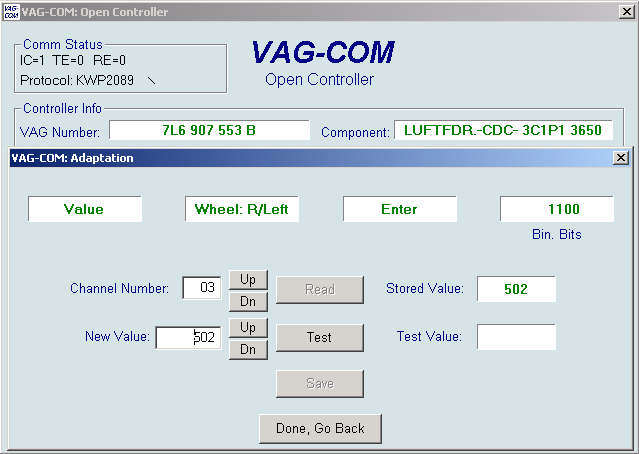
Channel 03 (rear left)
[Read]
Measure the heights from wheel center to the lower edge of the fender (see
comments).
Enter the ACTUAL MEASURED VALUE FROM
THE CAR in "new value" in Millimeters into Channel 03.
[Test]
[Save]
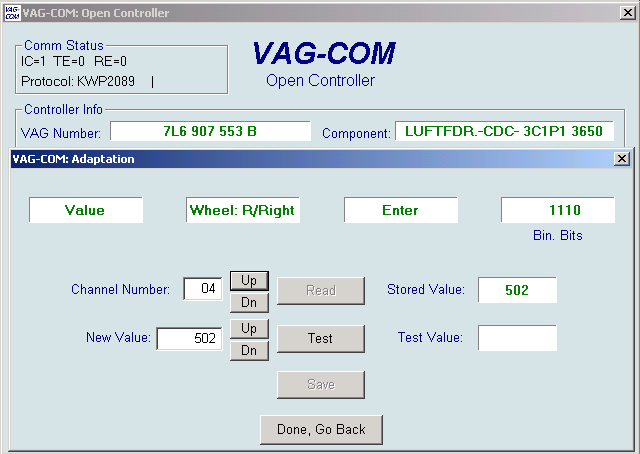
Channel 04 (rear right)
[Read]
Measure the heights from wheel center to the lower edge of the fender (see
comments).
Enter the ACTUAL MEASURED VALUE FROM
THE CAR in "new value" in Millimeters into Channel 04.
[Test]
[Save]
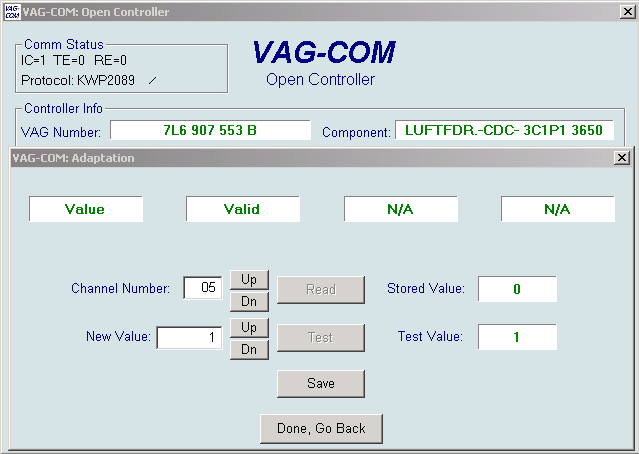
Channel 05 (confirmation)
[Read]
If all measured values are correct, enter "new value" of 1.
[Test]
[Save]
Click the [Done, Go Back]
button and you're all set.
Check for fault codes, if all
procedures went fine there should be none.
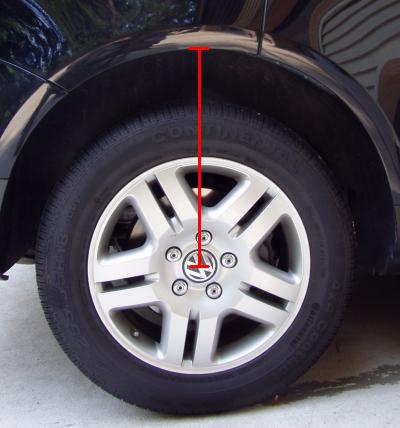
Comments:
The
height of each wheel is measured between the center of the wheel
(the space in between the V and the W) and the lower edge of the
fender. All measurements have to be done in Millimeters (mm).
If a Channel is not accepting a value, put the "new value" in again and
click [Test] and [Save] again instead of starting the whole process from the beginning.
In some cases the controller says "invalid value", start "rocking" the car a little bit, this should solve problem.